# Single Sign On (SSO)
Information on our SSO system.
# General documentation on our SSO system
Single Sign-On (SSO) is a technology that allows users to log in once and access multiple applications without the need to log in again. Keycloak is the SSO system offered by our company that provides managed hosting services. It simplifies the authentication process and enhances the user experience.
### SSO with Keycloak - features
At Cloud68.co we use [Keycloak](https://www.keycloak.org/), an well established open source platform, for user authentication. This is very helpful when you have more than one instance with us. Below are the main features of our SSO solution with Keycloak:
- Centralized Authentication: Keycloak provides centralized authentication for the majority (but not all) of the applications and services listed [here](https://cloud68.co/instances.html). Once the user logs in to Keycloak, they can access all the applications and services without the need to log in again.
- Multiple Authentication Methods: Keycloak supports multiple authentication methods, including username and password, two-factor authentication, and SAML-based authentication.
- User Provisioning: Keycloak supports user provisioning, which allows users to be added, modified, or removed from one or all your instances managed with us. You can do this yourself or [open a support ticket](https://docs.cloud68.co/books/tech-support-faqs) so that we handle it.
- Role-Based Access Control: Keycloak supports role-based access control, which allows access to be granted based on the user's role in the organization.
### Benefits of using Keycloak for your SSO needs
- Improved Security: a higher level of security is achieved with this approach, as users only need to remember one set of login credentials, reducing the risk of weak passwords and password reuse.
- Support two factor authentication (2fa) when it is not possible. Example: BigBlueButton does not support 2FA, but this can be implemented through Keyloak.
- Simplified User Experience: our SSO system simplifies the user experience by providing a single login for all applications and services, reducing the need for users to remember multiple usernames and passwords.
- Increased Productivity: your team can increase productivity by reducing the time it takes for users to log in to multiple applications and services.
### Getting SSO for your infrastructure
Our SSO solution is available free of charge for all users that have at least three (3) managed hosting software (instances) on an active billing cycle.If you need less than three instances, the cost for the Managed Hosting Keycloak instance is 9Eur/month.
Keep in mind that not all platforms available on our website from [this page](https://cloud68.co/instances.html) support Keycloak and/or SSO for authentication.
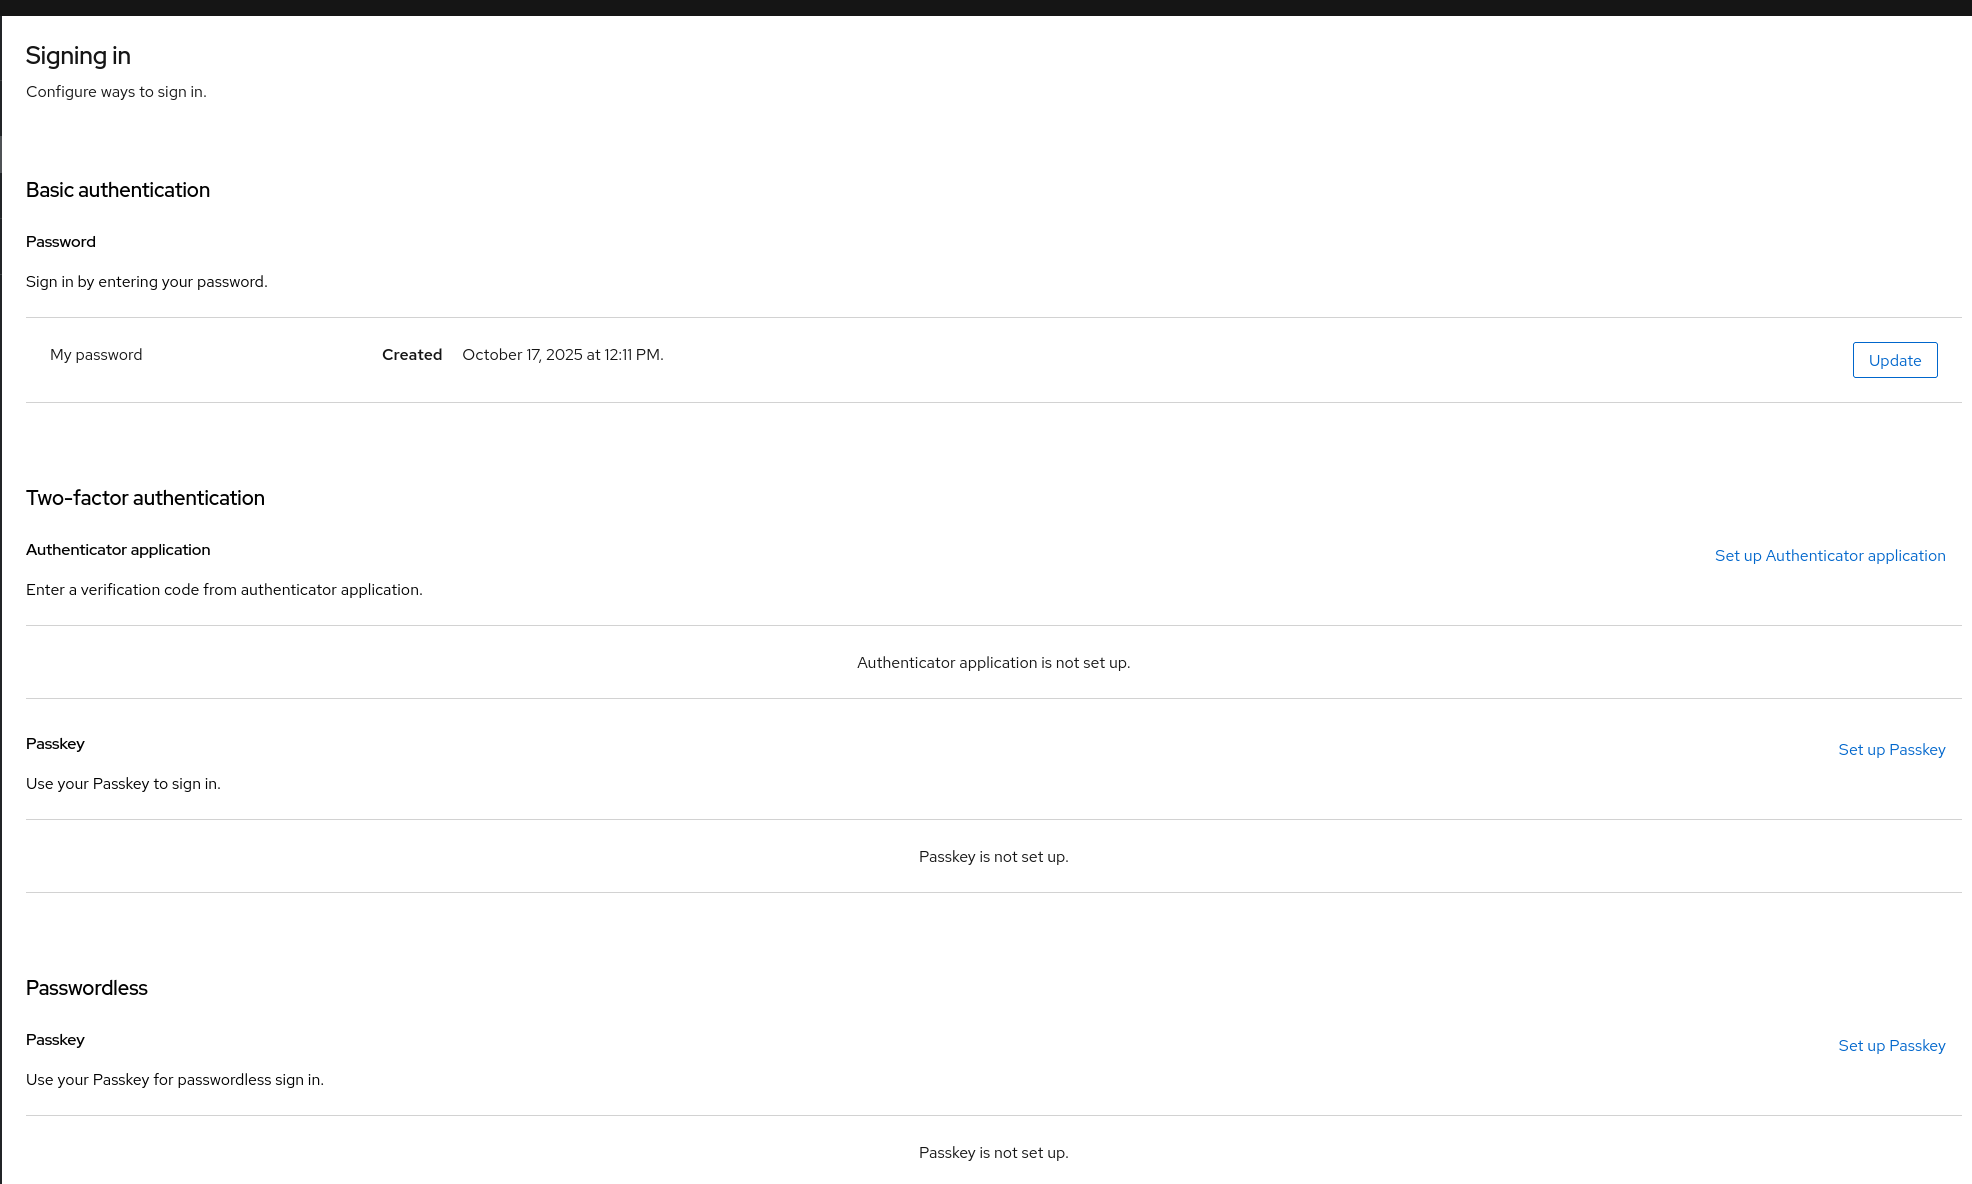
# How to configure Passkeys
Below is a step-by-step guide how to configure passkeys as an authentication method for Keycloak.
First step is to go to your **Keycloak URL** instance and login using your SSO credentials.
Upon login, you will land on the **Keycloak Console**.
[](https://docs.cloud68.co/uploads/images/gallery/2026-01/5MyBBDuSWW8uIEuI-screenshot-from-2026-01-26-11-59-50.png)
Once there you need to go to **Account Security** and click **Signing in** which will open the authentication options.
[](https://docs.cloud68.co/uploads/images/gallery/2026-01/OldKZw3KzDQf0s4q-image.png)
Click on **Set up Passkey**, and it will take you to a window to register the passkey as seen below.
[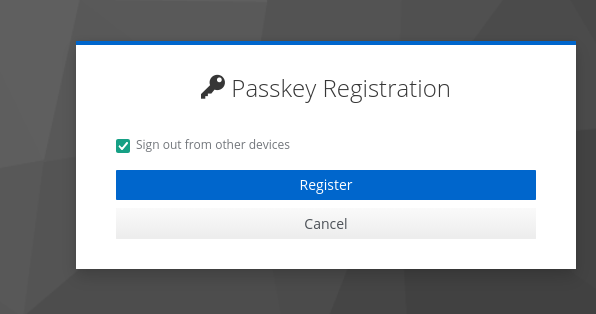](https://docs.cloud68.co/uploads/images/gallery/2026-01/VTR68zjaa4hTIONR-screenshot-from-2026-01-26-12-02-42.png)
Follow the steps and configure your passkey, and you will be able to log in using your Titan keys.
There is also a way for users to enforce this way of authenticating and when the user logs in, it is required to set it up following the steps above, but this is only if all Keycloak users will use this method of authentication.
# How to terminate all sessions for a user on Keycloak
1. Login to Keycloak and go to Users on the left panel.
2. Locate the user and click on the name to open their options.
3. Go to Sessions, last button on the panel and Logout all sessions.
[](https://docs.cloud68.co/uploads/images/gallery/2026-01/h4Ti3a2T9j0sJDmI-image.png)
# Adding your logo and other visual elements (branding)
Unfortunately, you cannot make branding or visual customisations to your Keycloak instance directly. Changes such as uploading a logo, adjusting colours, or modifying other visual elements require modifications at the theme level, which fall outside the scope of what is accessible under our current Keycloak Managed Hosting setup and workflows.
To have these changes applied, you will need to open a support ticket as described in our [Tech Support (FAQs)](https://docs.cloud68.co/books/tech-support-faqs) documentation.
This service is provided free of charge for all subscribers who are receiving our [Add-On services](https://docs.cloud68.co/books/add-on-services).
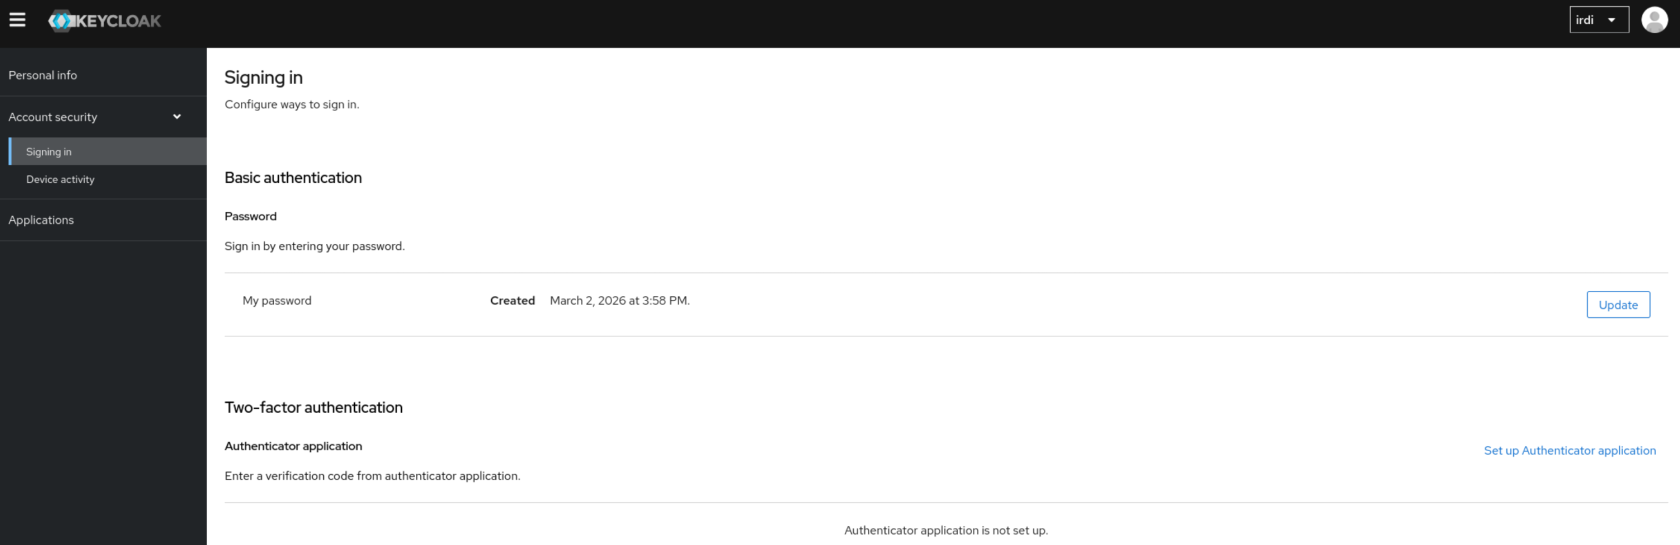
# How to change your password on Keycloak
Go to your Keycloak Console and Log in with your credentials.
Once logged in, go under Account Security → Signing in.
Under Basic authentication you will see and Update button next to My Password.
[](https://docs.cloud68.co/uploads/images/gallery/2026-03/HF1cC28lMWc5EXRq-image.png)
In case you do not know your Keycloak Login URL, please reach out to our [Support Team](https://docs.cloud68.co/books/tech-support-faqs/page/how-can-i-ask-for-tech-support).
# How to setup 2FA on Keycloak
Go to your Keycloak Console and Log in with your credentials.
Once logged in, go under Account Security → Signing in.
Under Two-Factor authentication click on Set up Authenticator application and follow the steps.
[](https://docs.cloud68.co/uploads/images/gallery/2026-03/BvuS94iBWuCfnT7x-image.png)
In case you do not know your Keycloak Login URL, please reach out to our [Support Team](https://docs.cloud68.co/books/tech-support-faqs/page/how-can-i-ask-for-tech-support).
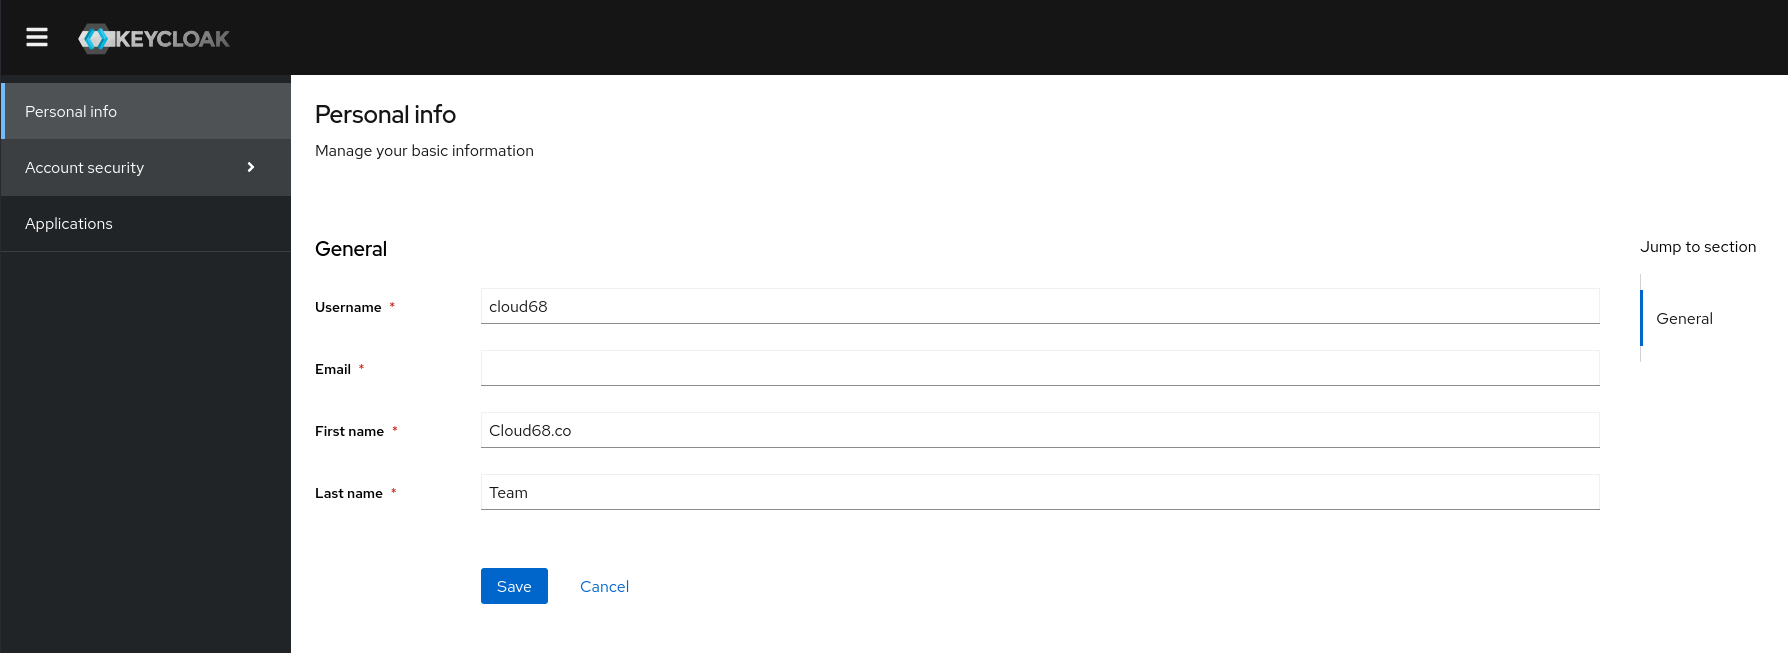
# How to create a user on Keycloak
In order to create a new user on Keycloak follow the steps below.
1. **Visit Admin Dashboard:**
- Go to: Your Keycloak URL
- Log in using the admin account.
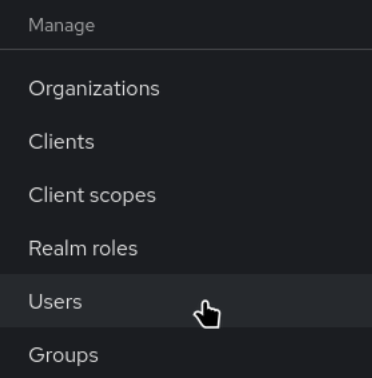
2. **Create a New User:**
- Navigate to **Users** on the left side of the dashboard.
[](https://docs.cloud68.co/uploads/images/gallery/2026-03/VHAgQ0ARjgfqVSC2-image.png)
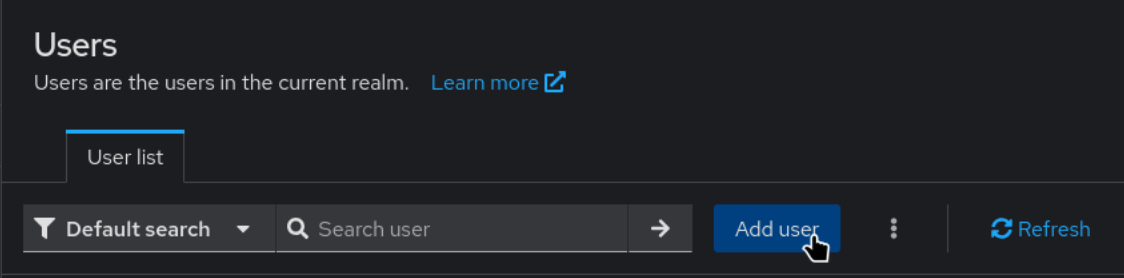
- Click on **Add User.**
[](https://docs.cloud68.co/uploads/images/gallery/2026-03/vbQGm0wMfrZf1Jhn-image.png)
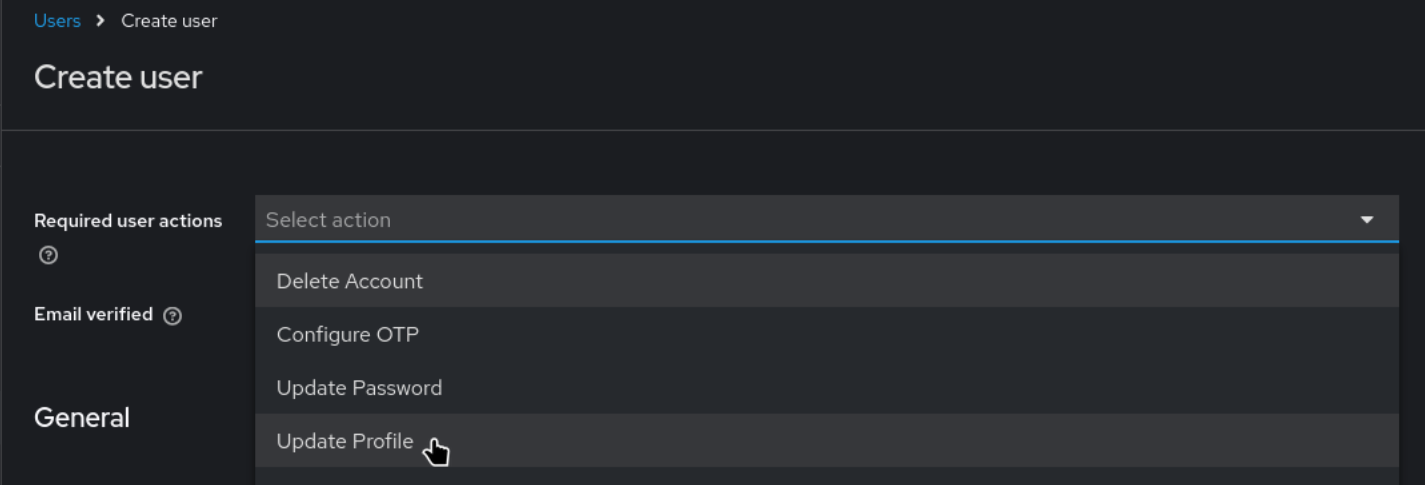
- Under **Required user actions**, select **Update Profile.**
**In case user impersonation is required leave this empty.**
[](https://docs.cloud68.co/uploads/images/gallery/2026-03/zuKvD5rPJPhibfgi-image.png)
- Set **Email Verified** to **ON**.
[](https://docs.cloud68.co/uploads/images/gallery/2026-03/8SGuHSDKVHYC1wba-image.png)
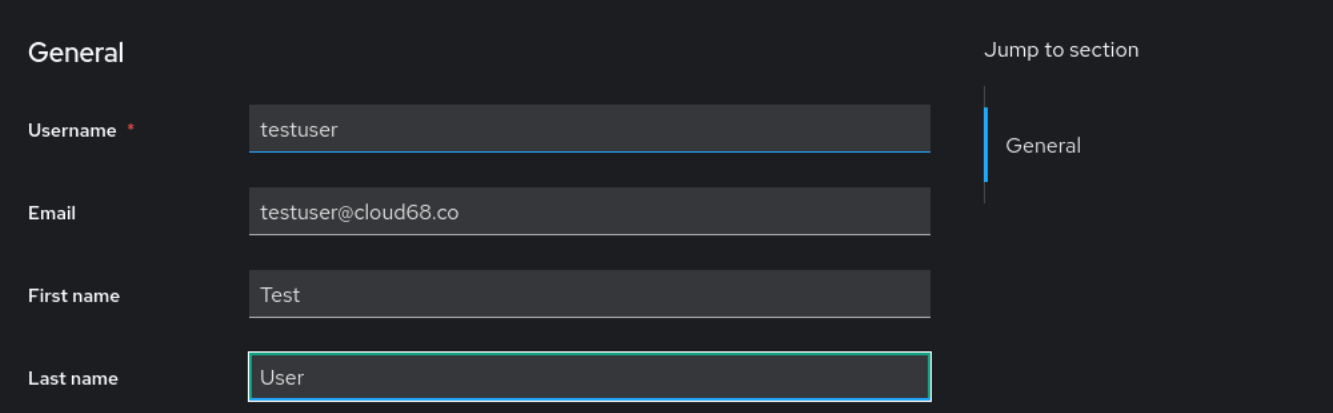
- Fill in the **Username**, **Email**, **First** **Name**
[](https://docs.cloud68.co/uploads/images/gallery/2026-03/MG6dhs1G7kzsImzC-image.png)
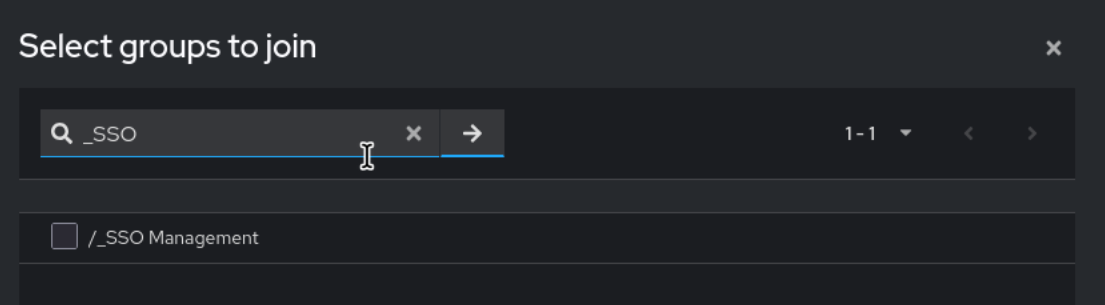
- Click **Join Groups** and add the user to the group it belongs.
[](https://docs.cloud68.co/uploads/images/gallery/2026-03/A5fnX3c0xtgkfpvY-image.png)
- Click **Create**
[](https://docs.cloud68.co/uploads/images/gallery/2026-03/OzHPWu3jPgYN7hhX-image.png)
3. **Send Password Reset Request:**
- Go to **Users**.
[](https://docs.cloud68.co/uploads/images/gallery/2026-03/MRy58PTsWFOKml5W-image.png)
- Click on the newly created user.
[](https://docs.cloud68.co/uploads/images/gallery/2026-03/f6K2Iw9RTxTn86IO-image.png)
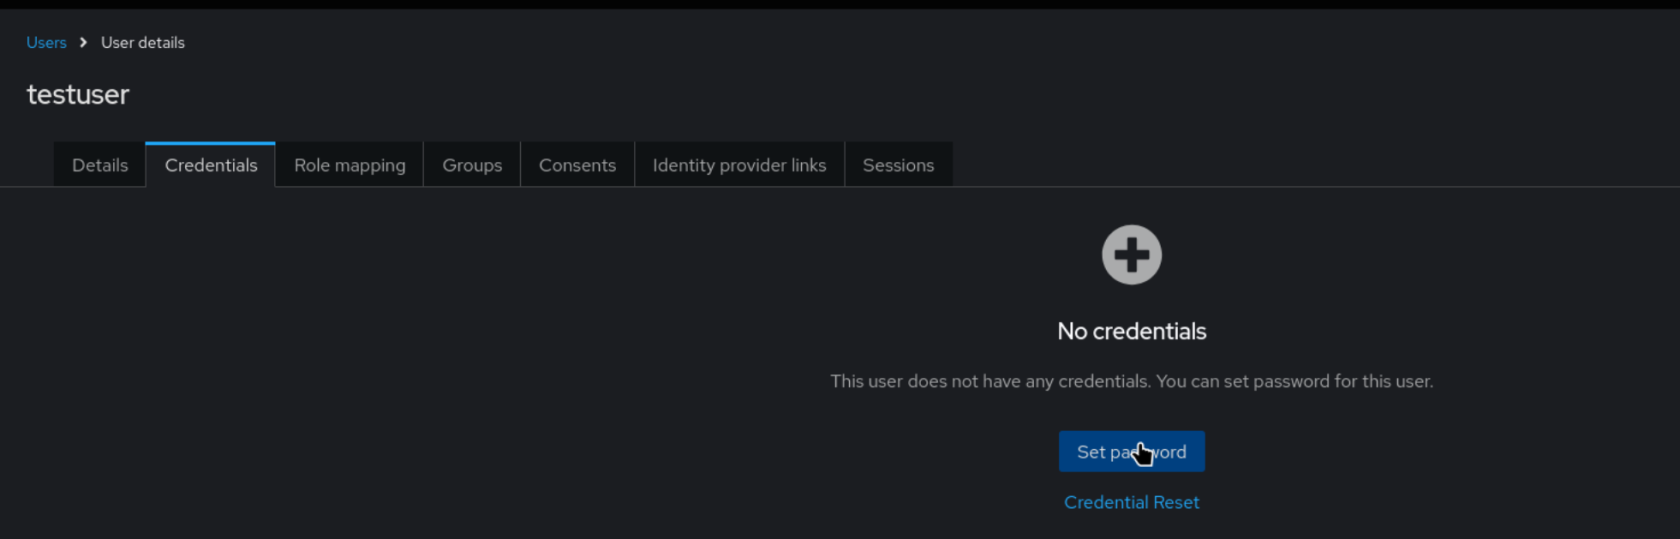
- Navigate to **Credentials** and click **Set a Password.**
[](https://docs.cloud68.co/uploads/images/gallery/2026-03/oUJ2LlsAHK28etlL-image.png)
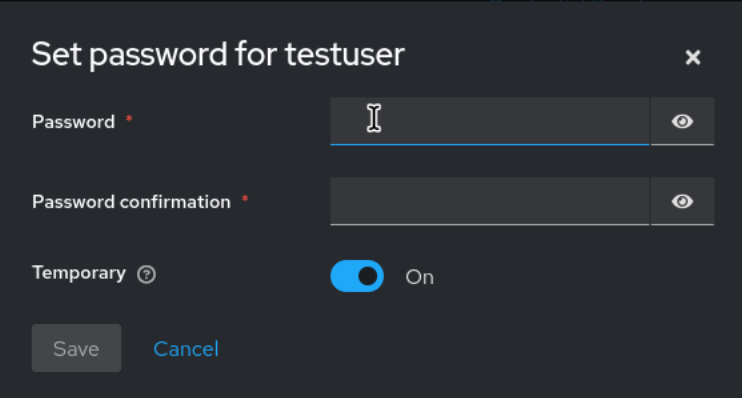
- Set a random Password and click **Save.**
**In case user impersonation is required toggle "Temporary" to Off so it does not require setting up a password when impersonating.**
[](https://docs.cloud68.co/uploads/images/gallery/2026-03/OGdS5N7pbqSO6QJ7-image.png)
\- Click **Credentials Reset.**
[](https://docs.cloud68.co/uploads/images/gallery/2026-03/BOOZLXxSHUKFAxqj-image.png)
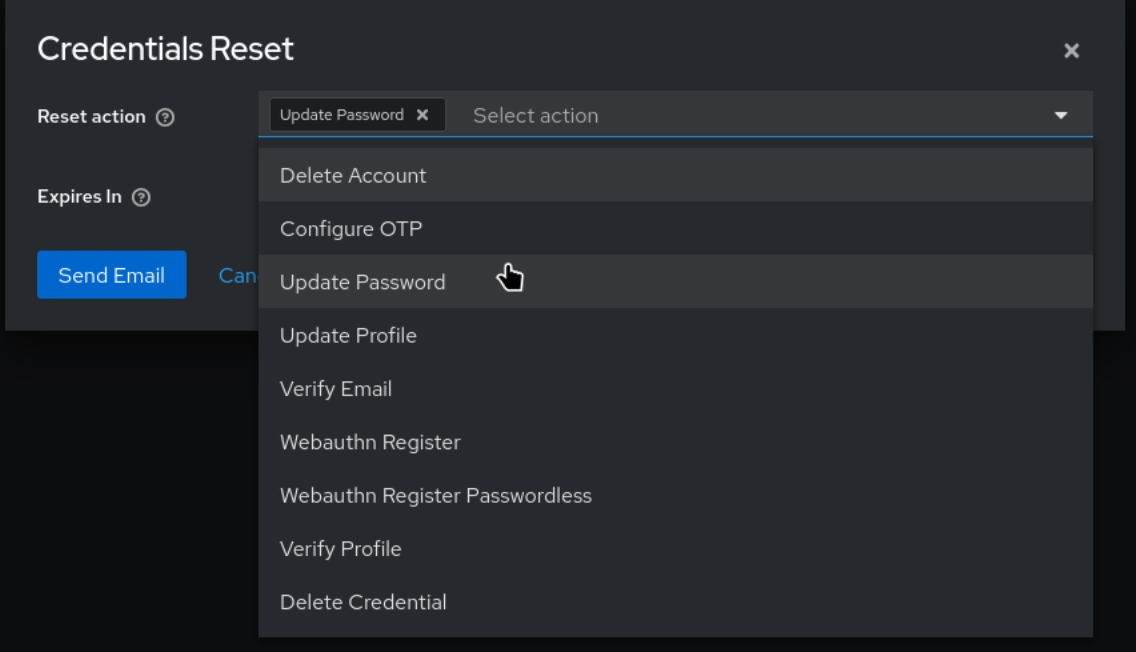
- On Reset action choose **Update Password.**
**In case you followed the user impersonation steps, on this step choose Update password and Update Profile**
[](https://docs.cloud68.co/uploads/images/gallery/2026-03/gGbx9vzyVAocD9Ic-image.png)
\- Choose an expiration time for the reset request and click Send.
[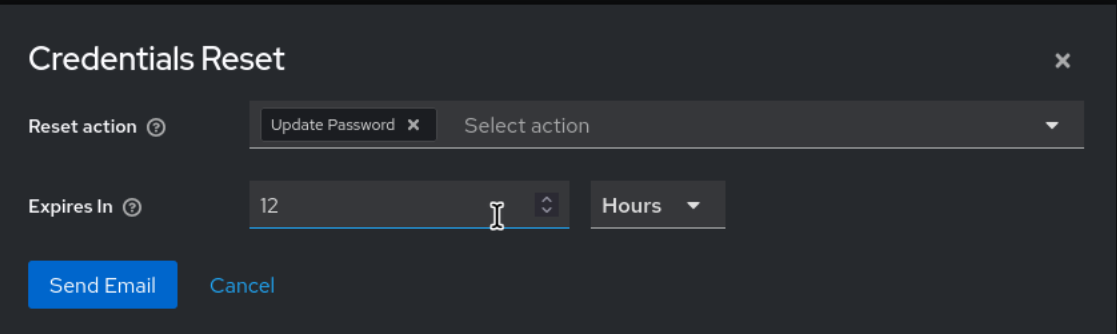](https://docs.cloud68.co/uploads/images/gallery/2026-03/DIrwCe1BkNONPxyn-image.png)
- Notify the user that they now have an account and will receive an email to reset their password and update their profile.
In case you do not know your Keycloak URL reach out to our [support team](https://docs.cloud68.co/books/tech-support-faqs/page/how-can-i-ask-for-tech-support).
# How to access admin console on Keycloak
If you have an administrator role on Keycloak you can access the administration console by going to the following URL
```
https://