How to add a new DNS record to your Namecheap account
One of the steps needed in order to set up one instance is for you (our Subscriber) to add a new DNS record to their domain. You can learn more about DNS here.
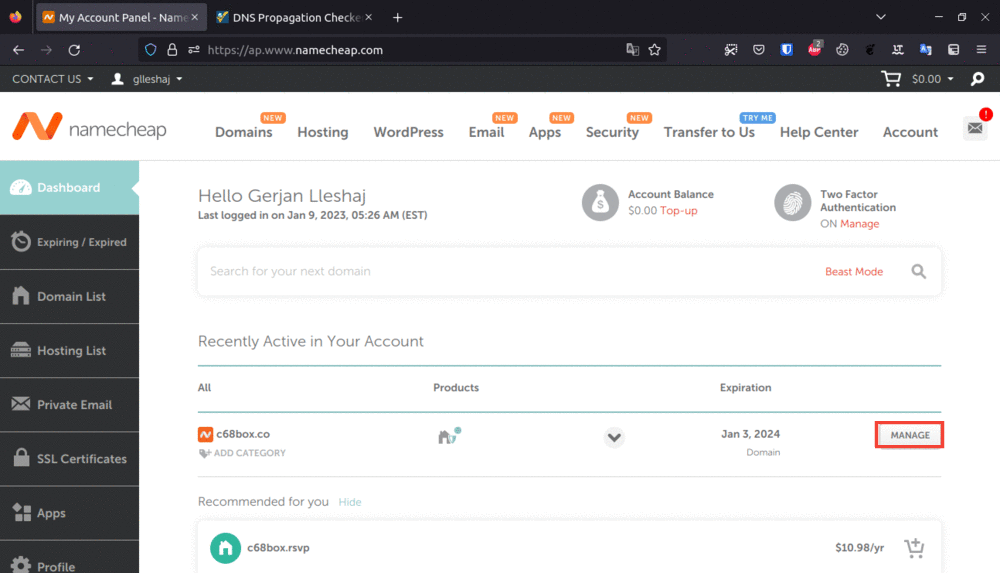
1. Login into the account where the domain was purchased.
2. Locate the domain which you wish to add the DNS record (you could have purchased multiple domains).
3. Click Manage.
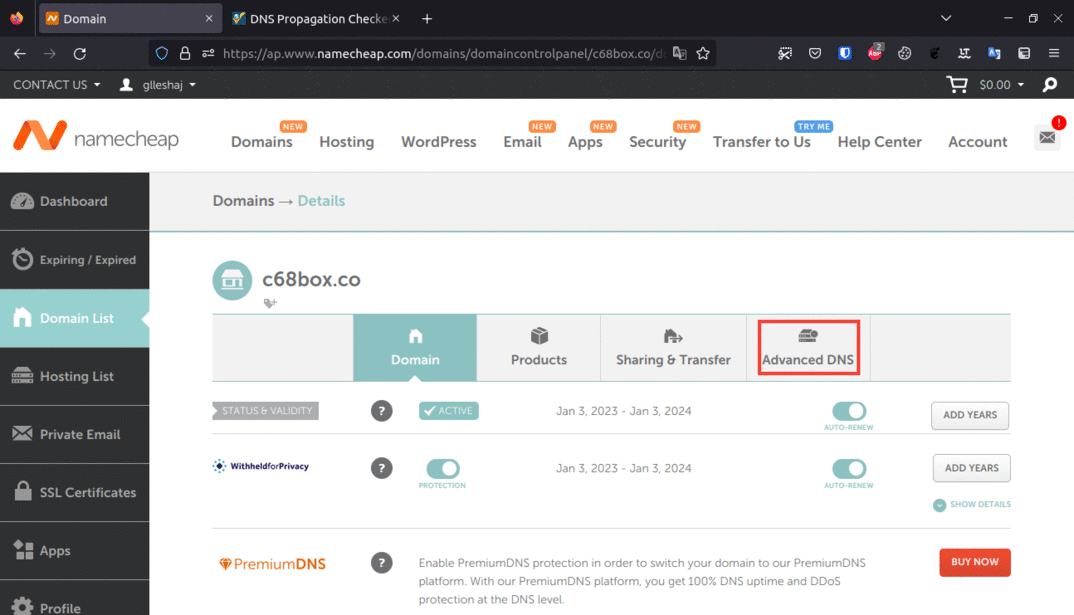
4. Click Advanced DNS.
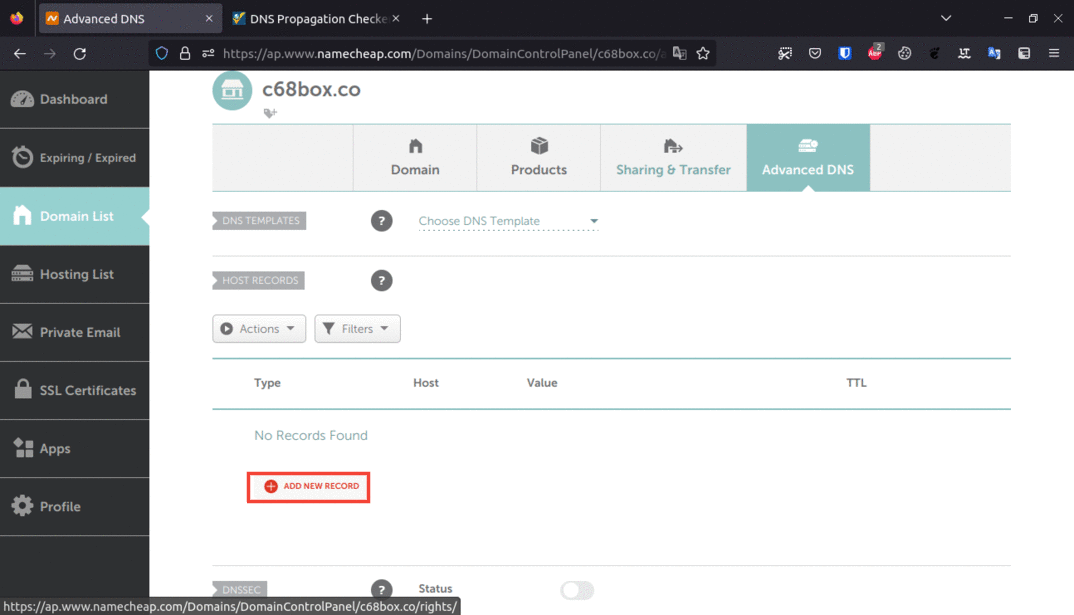
5. Scroll down if needed and click add new record.
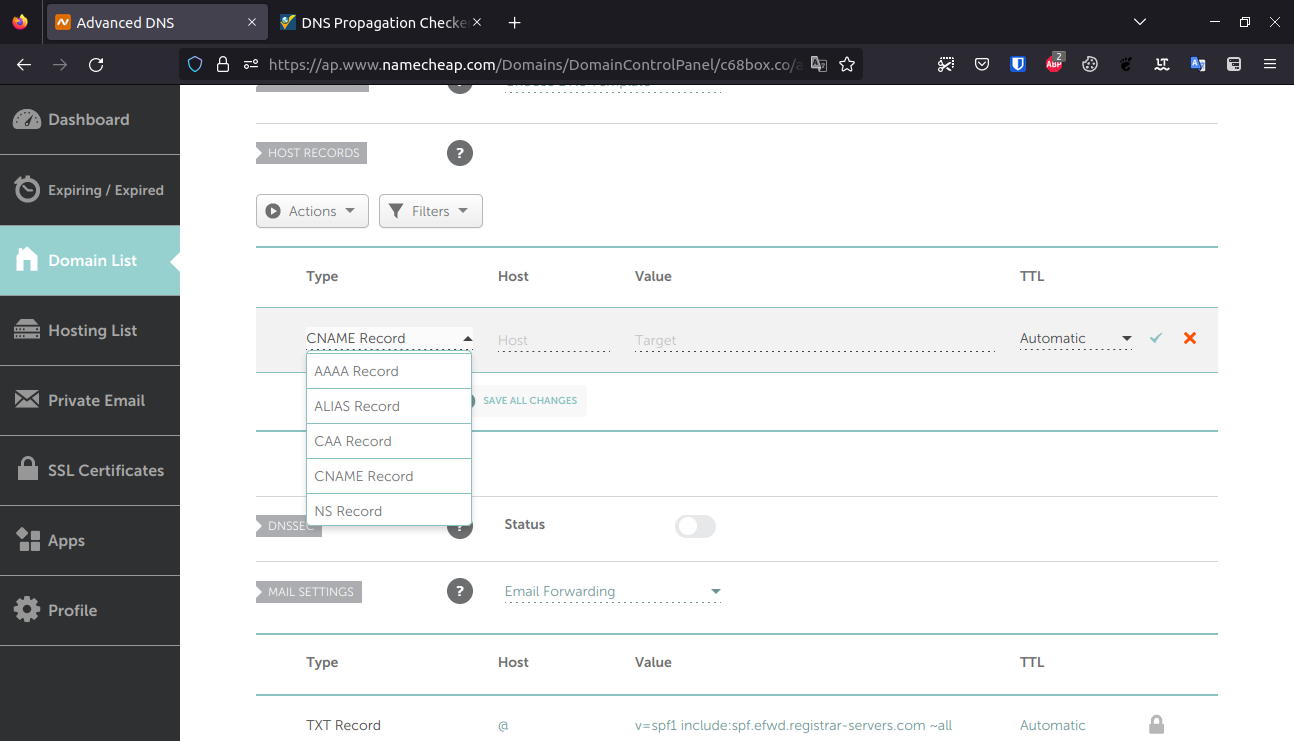
6. Select the type of record (this info will be provided on the email, if you chose to use a subdomain the record type will be CNAME).
7. On the host field type the details send on the email ( in most cases will be a subdomain for example cloud.example.com, in this case you will need to input cloud on the host field).
8. on the value field input the info which is provided on the email (example of the value platform-subscriber.cloud68.systems.).
9. Click the “v” button to save your changes.
Once these settings have been saved, you have successfully changed the DNS records for your domain. These changes may take 1 - 4 hours to propagate throughout the web.
You can use this website https://www.whatsmydns.net/ * to check the propagation of your newly added DNS record. Please be careful to select the appropriate record type.
* We are not affiliated with this site, feel free to use any other site.


No comments to display
No comments to display